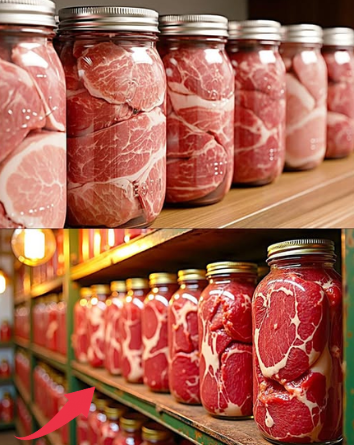
The Art of Preserving Food Without a Fridge
Long before refrigerators filled every kitchen, people relied on clever techniques to preserve their food. One of the most practical and delicious methods is canning meat with rice and vegetables. This old-fashioned trick not only extends the shelf life of meat but also creates ready-to-eat meals that last for months. Imagine opening a jar after a busy day, a camping trip, or even in an emergency, and finding a hearty, flavorful dish waiting for you—no cooking required.
Why Choose Canning Meat with Rice and Vegetables?
This method is more than just food preservation; it’s about convenience and peace of mind. You’re stocking your pantry with wholesome, filling meals free from artificial preservatives. Rice, vegetables, and fatty cuts of meat combine to create a dish that’s rich in flavor, balanced in nutrition, and easy to store. With just a few jars, you can ensure your family has access to satisfying meals any time of the year.
What You’ll Need to Get Started
The beauty of this recipe lies in its simplicity. You don’t need specialized equipment beyond jars and a large pot. Here’s a list of ingredients and tools to gather before starting:
- 1.3 kg beef neck (or pork shoulder/any fatty cut)
- 2 medium onions
- 2 medium carrots
- 800 g short- or medium-grain rice
- 1 tsp salt per kilogram of meat
- Ground black pepper to taste
- 1 tsp sweet paprika
- 1 tsp dry spice mix (optional)
- Vegetable oil for frying
- 9% vinegar (1 tablespoon per jar)
- Boiling water
- 0.7-liter glass jars with lids
- A towel or cloth for lining the pot
Step-by-Step Instructions for Canning Meat and Rice
1. Cut and Prepare the Meat
Choose a fatty cut like beef neck. The fat keeps the meat tender during long cooking. Cut into walnut-sized chunks for even distribution and easy jar packing.
2. Fry the Meat for Extra Flavor
Heat oil in a large pan and brown the meat pieces until they develop a golden crust. This searing step locks in juices and intensifies the taste.
3. Add Aromatic Onions
Chop the onions finely and add them to the sizzling meat. Stir until they soften and turn golden, creating a base full of rich, savory aroma.
4. Stir in Carrots and Spices
Dice carrots into small cubes and add them to the mix. Season generously with salt, pepper, paprika, and optional spices. The vegetables will soften, soaking up the flavors of the meat and seasoning.
Video : Canning THE BEST Homemade Beef Stew | Meal in a Jar | Long Time Food Storage
5. Wash and Prepare the Rice
Rinse the rice under running water until clear. This removes excess starch, ensuring fluffy grains that won’t clump together during the long preservation process.
Assembling the Jars: Layer Like a Pro
6. Layer Ingredients in Jars
Sterilize jars first. Then, follow this layering pattern:
- 3 tablespoons rice at the bottom
- A spoonful of the meat-vegetable mixture
- Another layer of rice
- More meat mixture
- Finish with rice, leaving two fingers’ width of space at the top
This structure ensures even cooking while looking appealing when you open the jar.
7. Add Liquid and Vinegar
Pour boiling water into each jar until contents are submerged. Add 1 tablespoon vinegar to each jar—it aids preservation and sharpens flavor.
8. Seal the Jars Securely
Wipe the rims clean and fasten lids tightly. Proper sealing is crucial to prevent contamination and ensure vacuum sealing once cooked.
Cooking and Preservation Process
9. Boil the Jars for 4 Hours
Place a towel at the bottom of a large pot to protect jars. Arrange them carefully and pour hot water until it reaches the jar lids. Bring to a boil, then simmer gently for 4 hours. Keep topping up with hot water if the level drops.
10. Cooling and Storage
Turn off the heat and let jars cool slowly in the pot or under a towel. Once cooled, check the lids. They should be slightly indented, confirming a good seal. Store sealed jars in a cool, dark place for up to 12 months.
How to Enjoy Your Canned Meat and Rice
Using these jars is effortless:
- Reheat the contents in a pan or microwave.
- Pair with fresh salad, pickles, or bread.
- Take them camping, on long trips, or enjoy them at home when time is short.
Why This Method Works So Well
- Salt and Vinegar: Natural preservatives that combat bacterial growth.
- Fat and Liquid Seal: Creates a flavorful, airtight environment inside the jar.
- Extended Boiling: Simulates pressure cooking, ensuring safety and tenderness.
Extra Tips for Success
- Always sterilize jars before use.
- Use new, undamaged lids every time.
- If any jar doesn’t seal or looks spoiled, discard immediately.
- For variety, add mushrooms, bell peppers, or peas for extra flavor and nutrition.
Video : Canning THE BEST Homemade Chicken Soup | Meal in a Jar | Long Time Food Storage
Conclusion: Tradition Meets Convenience
Canning meat with rice and vegetables is more than a recipe—it’s a survival skill, a time-saver, and a way to bring traditional flavors into modern life. With minimal effort, you can prepare nutritious, long-lasting meals that your family will love. Whether you’re prepping for emergencies, camping, or simply making weeknights easier, this method delivers flavor, nourishment, and convenience—sealed in a jar.